Showing posts with label sewing. Show all posts

Thursday, May 27, 2010

Naughty Tutu for Tootie-Grace

I threw together this simple tulle tutu for Grace to wear on her first birthday. I like to call it her "naughty tutu," as I tied knots throughout it, giving it some visual interest...not that Grace has ever been naughty when she wearing it, (ahem...) She wasn't crazy about it then, as she was barely walking, preferring to crawl, but chose to be adorable and wear it - mainly because it made her mommy happy :) Since the party, almost 2 years ago, she has worn it on a small handful of occasions, but never had a serious interest in it. The tutu has been hanging as room decor on the back of her bedroom closet door all of this time.

Here she is with a couple of her friends that came to the birthday party...

Last week, from out of nowhere, she re-discovered her sweet little tutu! She literally wore it all day long for 3 days straight - still not sure what got into her, but she loved it! Here are a couple of shots that I snagged of her with my cell phone...
Grace, tapping to the beat of her own drum....
I just thought this was super sweet - she's such a silly playful girl.
And, of course, with her beloved pink binkie... She only takes the bink when she's going to sleep, but given that this particular one had been "hiding" from her for almost a week, she wanted to honor it's return during the daytime, as she had missed it so very much.
...Without the binkie.
...With the binkie.
...and so on.


Sunday, February 7, 2010

A Few Other Window Panels

Here are a few other window treatments from around my house that I've sewn. These floral ones are in my dining room for now - I have big plans to replace them with a nice heavy rich colored brocade fabric, but that requires more cash than I'm willing to spend right now. I also covered my dining room table chairs in this same fabric. These were the first curtains that I had ever sewn - from about 6 or 7 years back, (embarassingly long time to have up the same window treatments, but it is what it is.) The panels are 114" long, still leaving about 4 more feet of bare wall above them in this room. Not a great photo of them, but you get the picture, right? I have these two narrow windows that flank the fireplace in the downstairs living area. Full sun floods through them during mid-day..summers are brutal. So, I lined these dupioni silk panels with a thermal fabric and a blackout fabric. They are awesome - not a drop of sunlight gets through them, so they serve their purpose well.
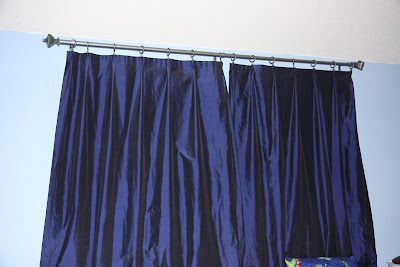
And lastly on my list today, are the silk panels that I literally threw together for my littlest son's room. At this point, his bed backs up agains this wall - would have included it in the photograph, but didn't feel like making his bed this morning :) The panels are floor length and lined with blackout fabric as well. Needless to say, they match his bedding - store bought, mind you, perfectly... His room decor is for another day, perhaps...

Grace's Bedding

I put the twins into twin beds, no pun intended, on their second birthday. For Grace's, I used a daybed that used to be in one of our spare bedrooms, but for the past several years, has been being stored under my own bed. For two purposes, I didn't want to leave the underside of her bed empty. First out, because it would become a haven for straggling toys, and secondly, because it was an awesome place for me to hide away some of our food storage. In any event, I needed to come up with a dust ruffle to cover the underneath portion. This particular daybed does not accomodate a standard ruffle because of the slats underneath the mattress, so I had to be a little creative. (by the way, pardon this photograph - it was taken on my iPhone..., pun: but you get the picture...)
I gathered and sewed up these panels, then stitched velcro, (yes, I said velcro,) along the tops. Having to purchase it separately, I lined the underside of her bed with sticky-back velcro. Viola! Problem solved. All I had to do was line the panels up with the bed, and she was good to go.


Now, on to the next project, her bedding. For now, she is using a white down comforter, but I already have a vision of the quilt that I am going to make for her bed, which will tie everything in her room together... You'll just have to wait for now to see the finished product!

Drapery for Grace's Room - A Work in Progress

As with most rooms in my home, they are a work in progress...and so it is with Grace's room. Once again, with store-bought bedding not appealing to me, I take on the challenge of sewing my own custom bedding and window treatments. Deciding on a color palette was by far the most challenging thing I've had to do so far. I didn't want the standard pink and purple decor, and loathe the idea of a themed room like Barbie or the Disney Princesses, so I set out on my own to invision something exciting. After deciding on a bold color palette, the kids and I got started...and yes, I said the kids and I. They are always a lot of help, and I've learned that if I involve them, things tend to go smoother for me :)


When making long drapery, it is wise to just spread everything out in a wide open area - I chose my entry way, as usual. Walker helped me smooth out the coral colored fabric, and mark off cut and hem lines for two large panels...
Then he helped roll out the lining...
Grace did the cutting... (not really, but she thought she was really being a big helper!)
The fun part was left up to me...the sewing. These panels are 108" long, completed, so they were quite a hand full, literally, to sew up. I managed, and though I don't have the rest of the window treatment sewed up yet, they are now serving their original purpose in her room - to block out sunlight when she naps :) For now, they look like a huge wall of orange, but it's only temporary. Once I install tie-backs and sew up a top layer for the upper part of the window, they'll look like they came straight out of a magazine...

Crib Bedding for the Twins

When I was pregnant with the twins, I took it upon myself to sew custom bedding for their cribs. Not necessarily trying to save myself money or time, just not very impressed with what I had found in stores. Custom bedding is ridiculously priced, and after taking this task on, I know exactly why... Keeping in mind that I was sewing for two cribs instead of just one, and add in the fact that I am a perfectionist down to the last stitch, I spent a large amount of time on these. I am my own worst critic, but looking back on them now, I think they turned out really well.

This first photo is of Walker's crib... I commissioned my sister-in-law, Amy, to paint the tree mural - which turned out fabulous, (thanks again, Amy!)I wanted to keep the nursery colors very neutral until I knew each baby's personality, so I went with a creamy color and browns.
Here is the inside of his crib. I used the chocolate browns, creams, and a blue, almost a deep Tiffany blue for his bedding. I also sewed these teddy bears - one for each child, out of left over scraps from their bedding. Love them...

I also made these quilts, seen hanging over the back of the crib here, in their respective colors, using minky fabric on the back. Sooo soft and sweet.

...and his dust ruffle. Gracen's bedding was/is identical, with the exception that her dust ruffle was chocolate brown with a sheer polka-dotted brown ruffle sewn into the top, and her quilt & bear have pink in them rather than blue. I know for a fact that I photographed Gracen's bed, too, but for whatever the reason, cannot locate the files. Here are a couple of random photos that show her quilt and bumper.
(I will post Gracen's bedding photos when I come across them.)

Sunday, January 31, 2010

Not All That Crafty...

I don't consider myself to be the most "crafty" person who ever existed, but I have other talents to make up for my shortcomings. For instance, I can sew. I'm not claiming to sew well, but I know enough to give off the illusion that I can. I'm not one to be tooting my own horn, but as I sat in silence today, looking around, I felt a sense of accomplishment at. Even though I am self-taught, I have successfully sewn quite a few things around my house over the past couple of years, hence this post. Over time, I will be sharing pictures of some of the home furnishings and other "crafty" projects that I've completed.

For starters, here are the curtains that I whipped up for my kitchen windows. They are mostly along the back-side of the house, which catches full sunlight. I love how they sparkle when the outside light shines through the trim on these babies just right.

I loved the dark chocolate brown, golds, and the garnet colors in this fabric. I know the fabric is heavy, but I fell in love with it at first touch. It compliments every other color used in decorating the surrounding rooms, and ties in perfectly. I lined them in a coordinating garnet silk dupioni fabric that I used to make the drapes that flank either side of the fireplace mantle in the downstairs living area.

Oh, and I'm not too proud to admit that there are several safety pins holding some of these trumpets in their place...

I omitted the expensive trim from the curtain hanging over my kitchen sink, as it is a west-facing window and gets minimal lighting. Noone ever even notices :)

You would never guess that all of this trim is hot glued on, would you? ...the only quick and easy part of making these window treatments.